This topic covers installing the email module and setting it up. It also covers editing your email settings and preferences (e.g. if you need to make a change after the initial installation/setup).
Before you install the Email Module, you must have the following:
- Email installation files (wwipstuff.dll, newcat.dbf and newcat.fpt). Your ACEware Systems technician will send you these files when you purchase the module.
- Name of your SMTP Mail Server (e.g. mail.yourdomain.edu). Contact your network technician for this information.
- If your email server requires authentication, the correct user name and password.
- With Student Manager 8.0.083 and later, an option to send emails from Outlook is available. Please contact your ACEweb technician for more information.
Once you have the module files installed, you are ready to set up the Email module.
IMPORTANT: you must be a Student Manager administrator to access Email Settings.
- Get everyone else out of Student Manager.
- Select Tools > Database Admin > Email Settings.
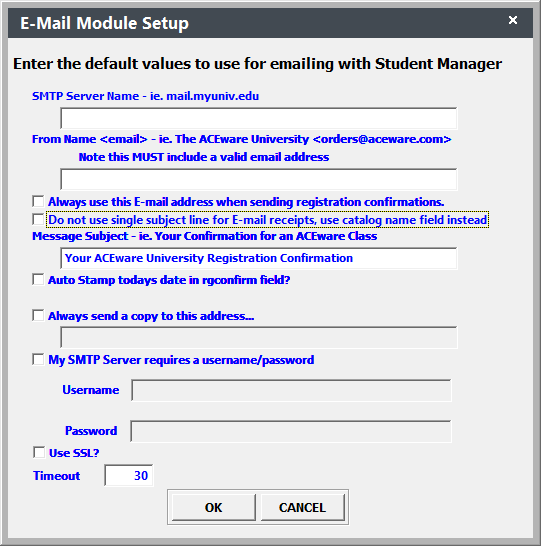
- Enter the following information and select the appropriate Email options:
- Name of your SMTP Mail Server. If you are using an *external server such as Gmail, you will need to enter a colon then the port number after the smtp server name. E.g. smtp.gmail.com:587. You must also complete step j.
- The default return email address to be used if the user does not have his/her email address entered on his/her user record.
- The subject text you want to use for registration confirmations that are mailed out from within Student Manager.
- Check Always use this E-mail address when sending registration confirmations box if you want to use this address instead of the staff's personal address (as entered in their user record) when emailing receipts.
- Check Do not use single subject line for Email receipts, use catalog name field instead if you want to use the catalog name for email receipts.
- Check Auto Stamp today's date in rgconfirm field? if you want to stamp the current date in the Confirmation field on the Registration screen (lower right of screen if enabled) each time a registration confirmation is sent out.
- Check Stamp date and course number in Student’s comment field? if you want to stamp the course number and date in the individual’s Name Comments field when emailing registration confirmations.
- Check Always send a copy to this address then enter the appropriate email address, if you always want to send a copy of confirmations to a particular person.
- If you are using an *external server such as Gmail:
- Check the My SMTP Server requires a username/password box.
- Enter the Username and Password of the external email server account.
- Check the Use SSL? box.
- Click the OK button to finish the Email setup. The program will shut down when the set up is complete.
*IMPORTANT: using an External Email Server such as Gmail also requires a copy of the wwdotnetbridge.dll in your Student Manager folder. Please contact your ACEware technician to obtain a copy of this file if you do not have one.
You must now set email access levels for each Student Manager user. To set the Access Levels:
- Start Student Manager.
- Select Tools > Password Maintenance.
- Set the appropriate Email access level for each user:
Access Level 2
Send quick email to individual
Send quick email to instructor
Access Level 3
Email Registration Confirmations
Access Level 4
Send quick email to class
Email roster to instructor(s)
Access Level 5
Send Mass Emails
When sending emails, the system will use the user's email address if it is entered in their user record. If not, it will use the default email address entered in step 3b of the Setting Up Email Module section (above). Each user can enter their own email address and an email signature on the Edit User Information screen.
IMPORTANT: you must be a Student Manager administrator to access Email Settings.
- Get everyone else out of Student Manager.
- Select Tools > Database Admin > Email Settings if you are running Student Manager version 8.0.032 or later. If you are running an earlier version of Student Manager, you must run the XSetmail.exe application in your Student Manager folder.
- Edit the desired settings.
- Click the OK button to save your changes and close the screen.