Your ACEware Systems technician will provide you with an installation file that contains the program files and your converted data.
Please make certain the server meets the minimum requirements to run Student Manager. Server/workstation requirements are listed on our website.
- Double click the installation file to start the installation process.
- Click Next on the Welcome window.
- Click Yes to the License Agreement.
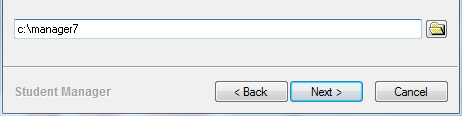
- Select the installation path (the default path is auto-entered for you, but you can change that if desired).
IMPORTANT: do NOT use spaces, symbols, or punctuation marks in your installation path/folder name.
- The files will now be extracted.
- When the extraction is completed, the Setup Complete window is displayed. Click the Finish button to finish the installation process.
- Navigate to the directory in which you installed Student Manager and locate the sm8.exe file. Double-click it to
start the program. This will complete the installation steps (i.e. installing the zip files, registering help, etc.).
Note: the login for new Student Manager systems is:
User ID: ACE
Password: ACE - Close the application.
Give all staff members who will run Student Manager full control of the Student Manager directory.
We recommend that all staff members be mapped to the Student Manager directory using the same drive letter and path. For example, map all directly into the Student Manager folder using the X: drive letter.
Once the installation is completed, you must create shortcuts to the application file for all users. To create a shortcut:
- Navigate to the Student Manager directory.
- Locate and highlight the sm8.exe file.
- Right click on the sm8.exe file and select Create Shortcut from the menu.
- The shortcut will be created in the installation folder.
- Rename the shortcut, if desired (right click on the shortcut and select Rename to rename it).
- On each user's computer, navigate to the directory and find the shortcut, then drag it to the desktop (this makes a copy of the shortcut and places it on the user's desktop).
Complete the remaining steps listed in the Student Manager Implementation Checklist.
If you have purchased other modules, you will also need to complete the steps listed in their checklists:
If you are purchasing or upgrading to the SQL version of Student Manager, please contact your ACEware technician for SQL Implementation documentation.