Grouping codes are used to identify courses for these procedures:
- Certificate programs
- ACEweb uses them to categorize your courses into groups (see course lookup by group options).
Grouping codes are created on the Codes screen.
Creating Grouping Codes for ACEweb Use
There are some special rules that apply to creating Grouping codes which are used on ACEweb:
Character Restrictions
Grouping codes and descriptions should consist only of letters (i.e. A, B, etc.), numbers (i.e. 1, 2, etc.), or a dash (-) to combine words (e.g. A-PLUS) except as specified when using GroupOption 2 (i.e. periods [.] are used in Grouping codes when using GroupOption 2).
Minimum Length Requirements
Grouping codes MUST be at least 3 characters in length to function properly. You will not get consistent results when searching for courses or displaying courses in groups if your Grouping codes are 1-2 characters long.
Description Requirements
ACEweb will use the grouping code description in the Course Group link, so you must enter descriptions for all grouping codes used with ACEweb.
Grouping Code Detail
ACEweb will display the Detail text on the page when a user clicks the course group.
You may enter an html formatted description in the Detail field. Or enter your text into the field then click the Generate HTML button to format the description.
- To begin formatting the text, click the Edit Text button.
- Specific formatting options:
- Create a Heading - highlight the text then click the Heading button. Note: heading text must be on its own line.
- Bold, Italicize, or Change Font Size - highlight the word(s) then click the appropriate button.
- Change Color - highlight the word(s), click the Define Color button and select a color.
- Set Font Style - highlight the word(s), click the Define Font button and select a font.
- Add a Subscript or Superscript - highlight the character(s) then click the appropriate button.
- Add a Horizontal Line - add a line break where you want the line to be then click the Line button.
- Bulleted List - highlight the text you want to bullet, then click the List button. Note: each bulleted item must be on its own line before you click the button.
- Center a Paragraph - highlight the paragraph then click the Center button.
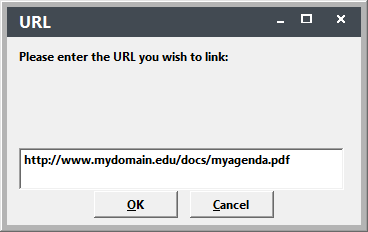
- Add a Hyperlink - a hyperlink is text that, if clicked, will open a specified URL. To create a hyperlink, highlight the text, click the Hyperlink button, then enter the URL:
- Embed a Video (e.g. from video sharing sites such as YouTube or Vimeo):
- Add an Image - IMPORTANT: the image must reside in your ACEweb Images folder (e.g. wconnect\ace\images) and you must enter the URL of the image.
To add an image, place your cursor where you want the image to be then click the Images button and enter the URL of the image.
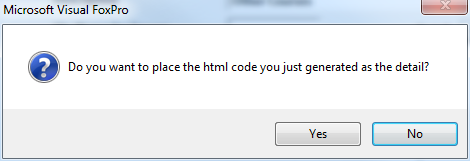
- When you are finished, click the Done button to close the Editor window and return to the Codes window. You will be asked if you want to generate the HTML code and enter it into the Detail field. Click the Yes button to generate the HTML.
- Your HTML formatted description is now entered into the Detail field. Click the Save button to save the changes to the Grouping code record.
Grouping Code Image
For use with the Graphical Group Listing option. Will display the image next to the group on the Group listing page.
Assigning Grouping Codes to Courses
You can assign multiple grouping codes to a course record. For example, if you want the Introduction to Microsoft Office course to show in the Computer Courses group and in the Business Courses group, you can assign both grouping codes to the course.
To assign grouping codes to a course:
- Open the course record.
- Click the Grouping Code button*.
- Click on the code you want to assign to the course**.
- Click the OK button.
- Click the Save button on the course record to save your changes.
*If you don't see the Grouping Code field/button on the Course screen, you will need to enable it in Course Preferences.
**To select more than one code, press and hold the CTRL key while clicking on the grouping codes.